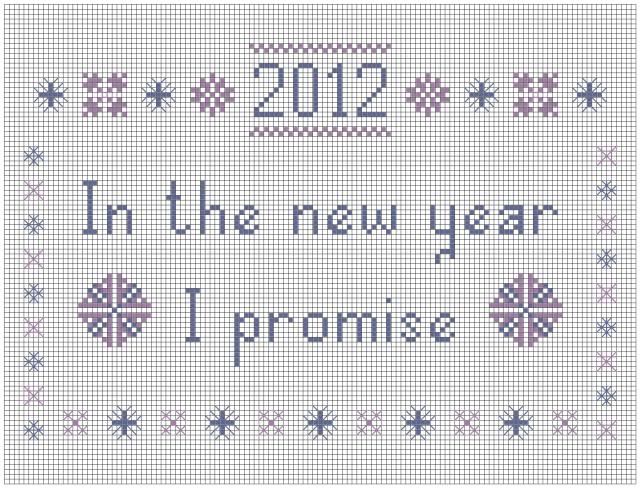
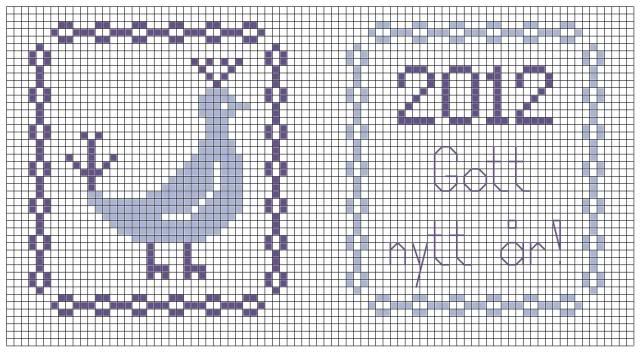
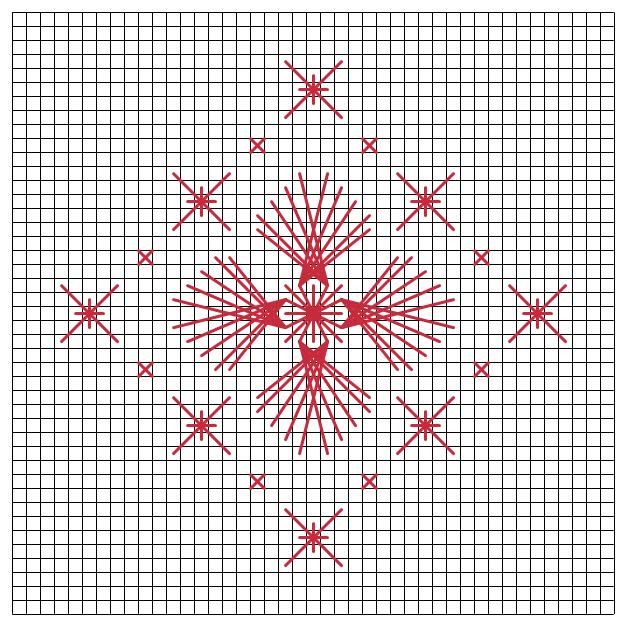
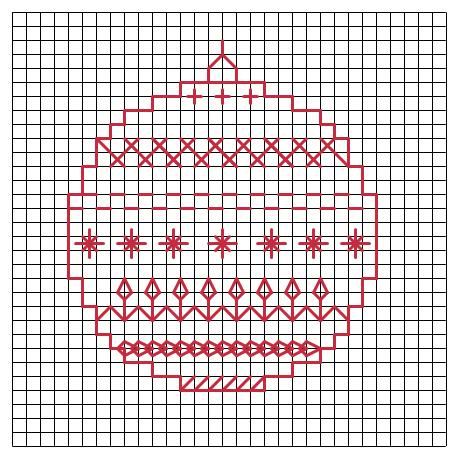
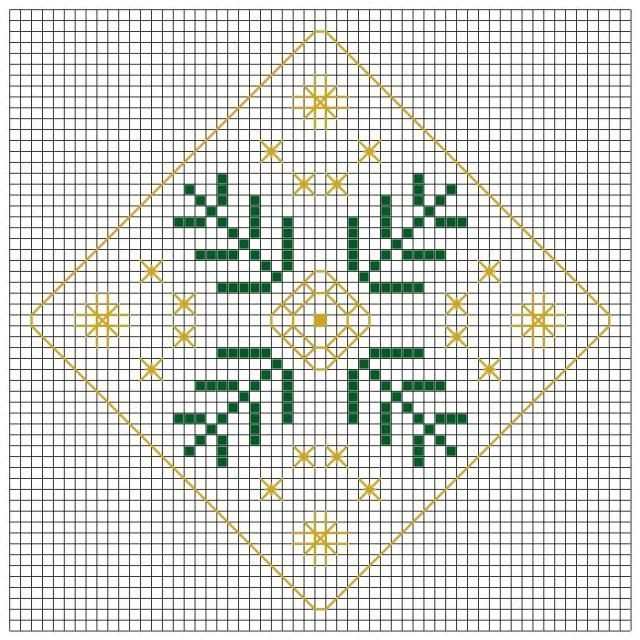
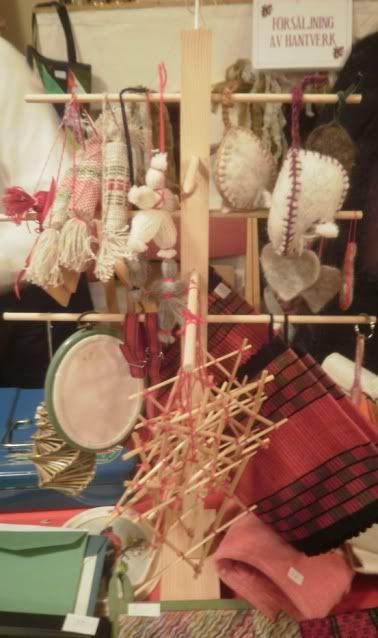
Here is the free pattern about my New Year Resolutions. At least, the first part ;) With snowflakes - because here in Sweden we are really missing snow now (although I have to admit I do enjoy the sunshine).
Second part coming soon, I promise :D :D
Welcome
Welcome to my blog. You can read about my adventures in different types of needlework, and I also offer some free cross stitch patterns. Please, come back often. :)
CAN'T SEE THE PICTURES? READ ABOUT THE PROBLEM HERE.
PLEASE NOTE:
PLEASE, NOTE: The designs on this site are copyrighted to Agnes Palko. They are for your personal use only. They may not be distributed or reproduced without permission.
If you wish to use my patterns to stitch for charity, please, let me know.
30/12/2011
27/12/2011
Happy new year
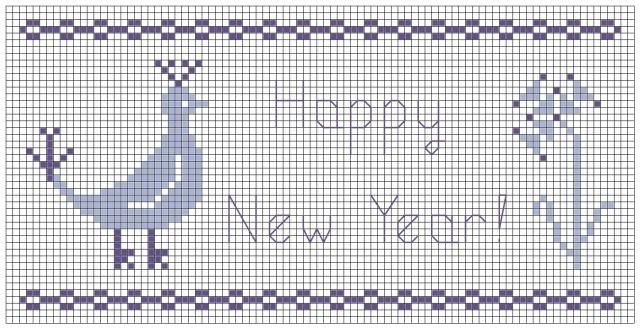
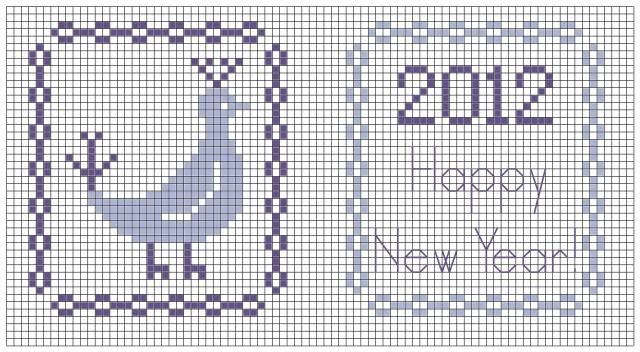
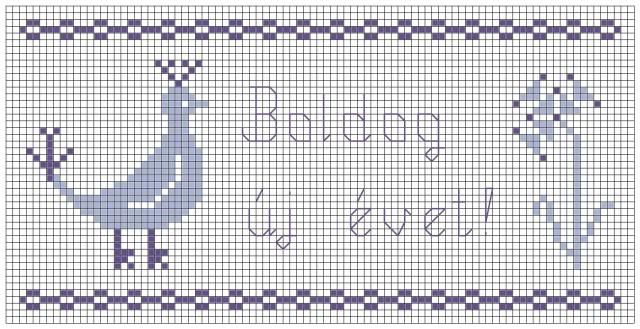
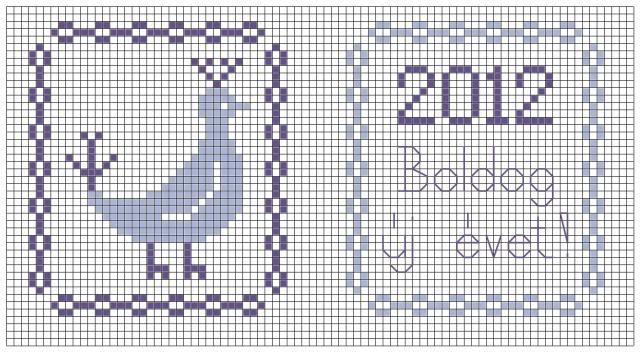
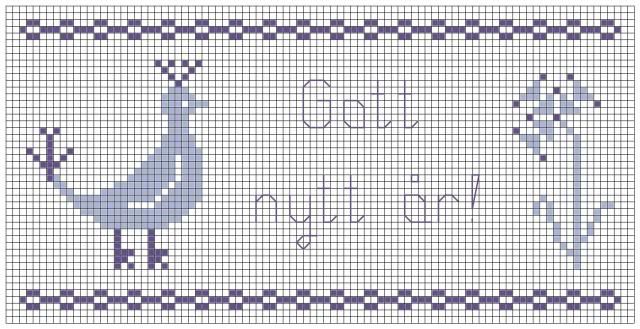
If you are over the Christmas frenzy, perhaps even got yourself some new stitching stash in the sales, it is time to make a "Happy New Year" ornament or card.
I made two versions, one with a bird and a flower in one pattern, and another for a two-sided ornament. It is also in three languages, English, Hungarian and Swedish.
The colours are:
DMC 333 blue violet very dark and
DMC 156 Blue violet middle light
Hope you like the pattern :)
I am soon coming back with a pattern about my New Year resolutions. :D :D
24/12/2011
Merry Christmas, happy holiday season
Wishing all my readers who celebrate, a very merry Christmas. And even if you don't, I wish peace and joy to everyone.
Accept these speciality-stitches mini-ornaments as my gift to you. They can be done in half an hour or so if you can find a little stitchy time during the holidays.
In the middle you can find smyrna stitch, then heringbone leaf stitch (find a diagram here: http://www.catiacrafts.com/tips.html - scroll down a bit) and different size star stitches, don't know their names but I hope they are obvious from the pattern.
Do the blackwork border first. The stitches used are: standing crosses, heringbone, running stitch, star stitch, the "candles" are made with lazy daisy stitches, then chain stitch and half cross stitch.
20/12/2011
Macramé Christmas trees and recycling Aida scrap pieces
I have made two macramé Christmas trees. I am just sorry it didn't occur to me earlier, I would have made more. They are really fun and I love the way they look.
The first one was done on a piece of "Aida" fabric that was actually a patchwork sewn together from small leftover pieces. One mistake I made - if you plan to recycle your Aida pieces, don't follow me there -: I shouldn't have put it in the embroidery hoop. The sewing was very fragile, the edges just overlapped and it came undone at one point - I had to hand-sew it. But I managed to save it eventually.
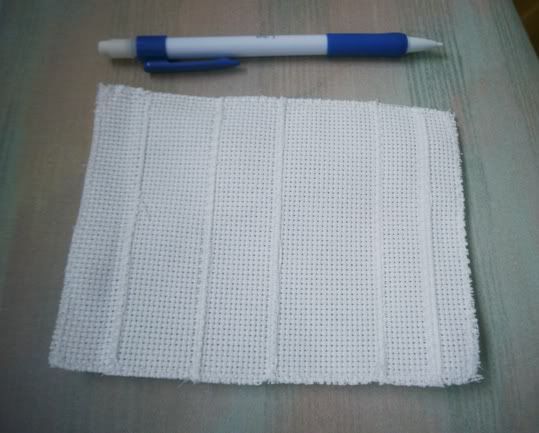
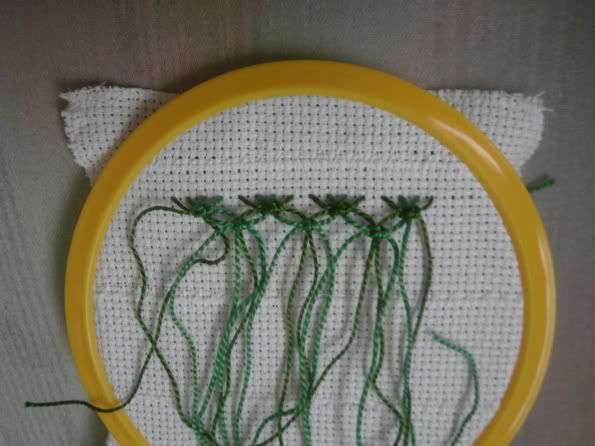
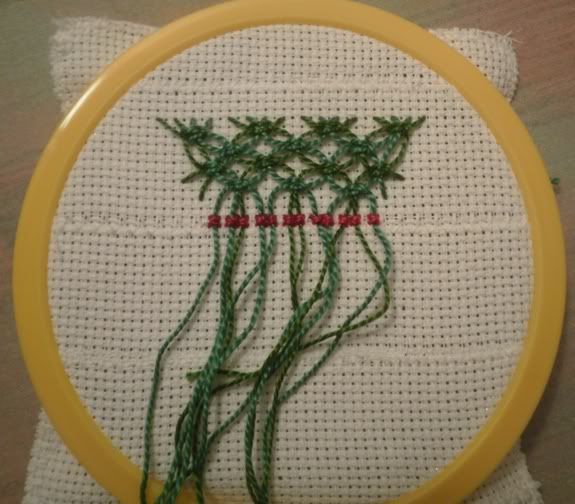
So, for the macramé. The tree is made upside down. I put in green perle thread (#8) and started to make square knots. After one row, I used two thread of each previous knot to make a new one, thus creating a net-like pattern.
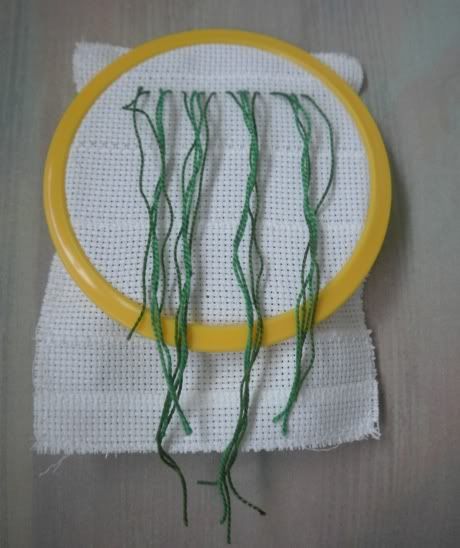
As I was going I made one knot less at the edges. This made the slanted side of the tree. I simply put the threads in a needle and pulled them to the other side. Also, I wanted to secure the macrame to the fabric, so after the fourth row I made a row of cross stitches in red, as decoration on the tree.
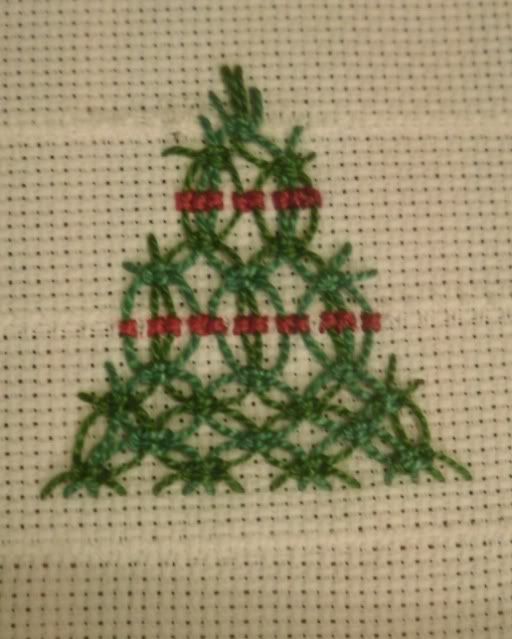
Then I continued in the same manner, leaving out knots at the ends, and sewing the threads down once more. I think, in the pictures you can see well how it was done.
And finally, turn it upside down:
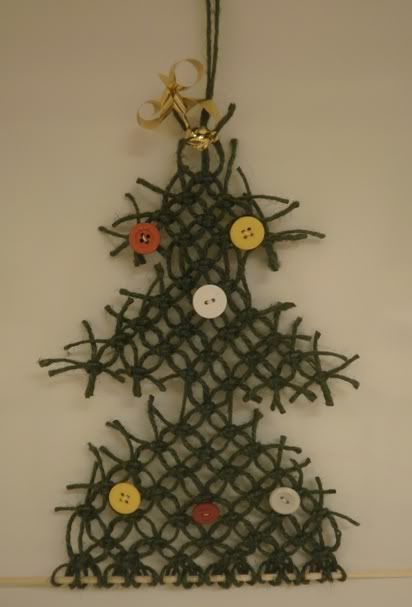
The second one is a bigger tree, about 30 cm tall. It was made of green(ish) hemp string. I hang the string on a wooden rod, and made the tree. Unfortunately I didn't make progress photos. The only tricky part was how to do the three "levels". Finally I did this: I left out knots at the ends, just as before, but later used the same threads for knots higher up. That resulted in straigth lines that were cut at the very end. Ta-da! Add some buttons for decoration and here is your Christmas tree. Done in about 30 minutes, too!
The first one was done on a piece of "Aida" fabric that was actually a patchwork sewn together from small leftover pieces. One mistake I made - if you plan to recycle your Aida pieces, don't follow me there -: I shouldn't have put it in the embroidery hoop. The sewing was very fragile, the edges just overlapped and it came undone at one point - I had to hand-sew it. But I managed to save it eventually.
So, for the macramé. The tree is made upside down. I put in green perle thread (#8) and started to make square knots. After one row, I used two thread of each previous knot to make a new one, thus creating a net-like pattern.
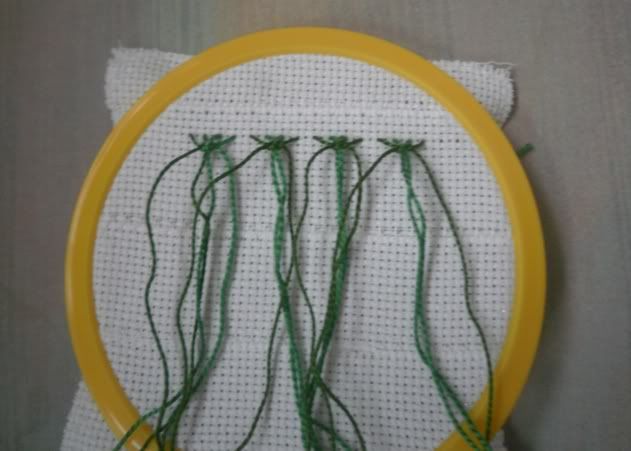
As I was going I made one knot less at the edges. This made the slanted side of the tree. I simply put the threads in a needle and pulled them to the other side. Also, I wanted to secure the macrame to the fabric, so after the fourth row I made a row of cross stitches in red, as decoration on the tree.
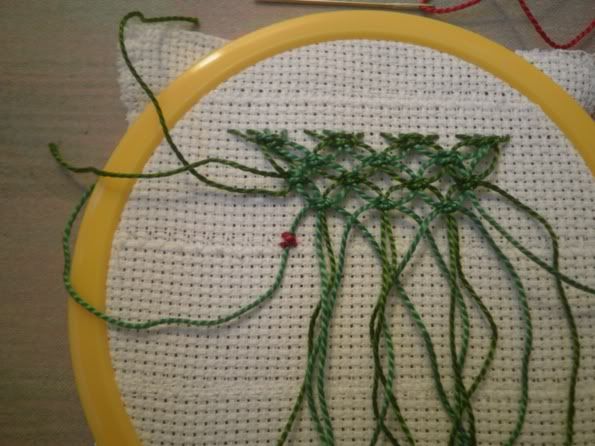
Then I continued in the same manner, leaving out knots at the ends, and sewing the threads down once more. I think, in the pictures you can see well how it was done.
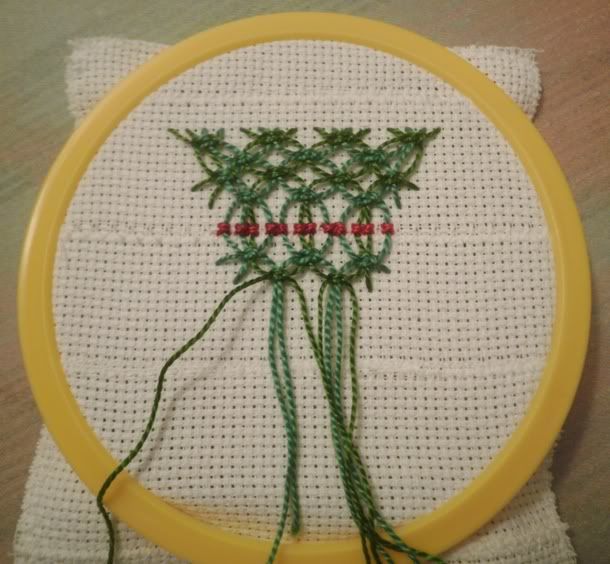
And finally, turn it upside down:
The second one is a bigger tree, about 30 cm tall. It was made of green(ish) hemp string. I hang the string on a wooden rod, and made the tree. Unfortunately I didn't make progress photos. The only tricky part was how to do the three "levels". Finally I did this: I left out knots at the ends, just as before, but later used the same threads for knots higher up. That resulted in straigth lines that were cut at the very end. Ta-da! Add some buttons for decoration and here is your Christmas tree. Done in about 30 minutes, too!
16/12/2011
Christmas biscornu
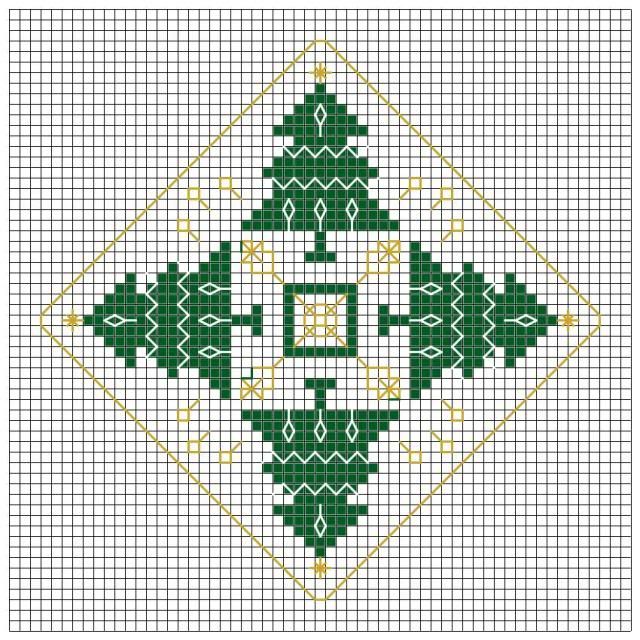
I know we are all busy preparing for Christmas, shopping and cleaning and decorating (not me, to tell the truth, I am trying to cure myself from this horrible cold and taking it easy) - but in this hectic time we need even more to be able to sit down for a while and relax with some stitching.
Here is a little pattern to help you with it, and it can be a good last-minute gift or decoration.
You can leave the middle square empty if you want to add a fancy button.
If/when I have time to stitch it, I will use metallic gold instead of the yellow. You know, we can all do with some extra bling in our lives. :) ;)
Hope you like it.
Labels:
biscornu,
christmas,
cross stitch,
free,
freebie,
ingyenes,
karácsonyi,
keresztszemes,
korstygn,
minta,
pattern,
xstitch
14/12/2011
Crazy quilting
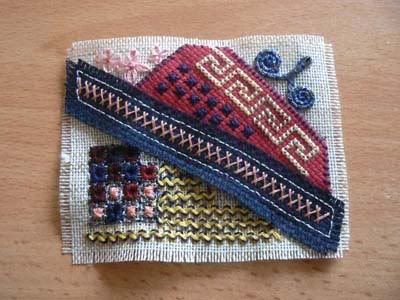
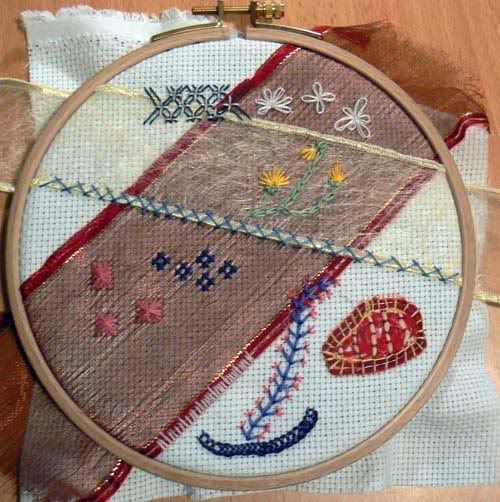
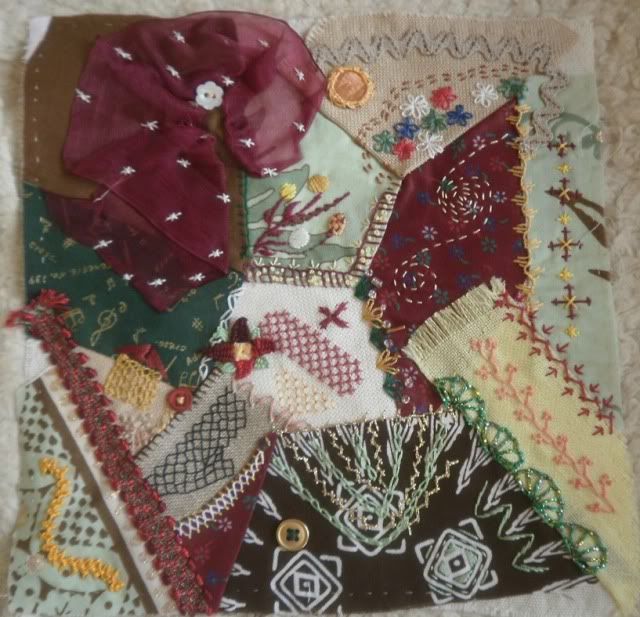
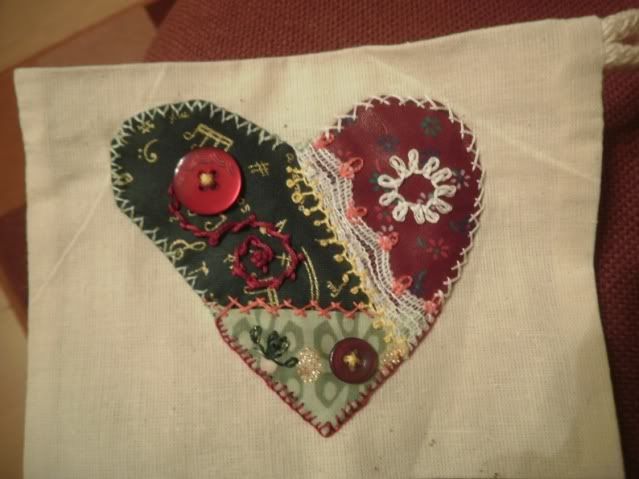
As we say in Hungarian: nagy fába vágtam a fejszémet. I am trying to cut down a really big tree. I joined the monthly crazy quilting challenge at http://www.cqjp2012.blogspot.com/ . This is going to be interesting and difficult, because I haven't done much crazy qulting, but what I have done, I really enjoyed. So I thought, as a preamble, I would post photos of my previous pieces. The first two are rather experiments, leading me to crazy qulting.
Well, I certainly hope I will make more and much better pieces than these. I have a great idea right now - but I am in a rush to finish my boyfriend's sweater I am knitting for Christmas - so it will have to wait.
So, from January, you can expect some posts with CQ. Wish me luck - and lots of time :).
13/12/2011
Two wonderful giweaways
at the following place: http://victorianmottosamplershoppe.blogspot.com
The yarns and patterns are yummy, and the giweaway is really a generous one. :)
12/12/2011
04/12/2011
A modern (psychedelic?) christmas tree - free pattern
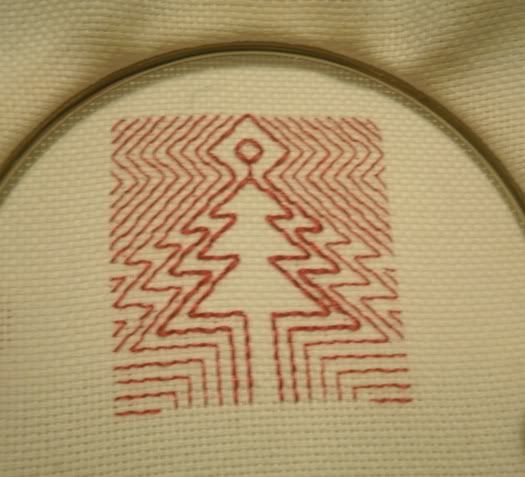
I have made a small blackwork Christmas tree pattern that is quite different from the ones before. I called it a "modern Christmas tree", my OH called it "psychedelic" :).
Anyway, I stitched it, using two threads in the middle, and one thread for the rest. Here it is, still in the hoop:
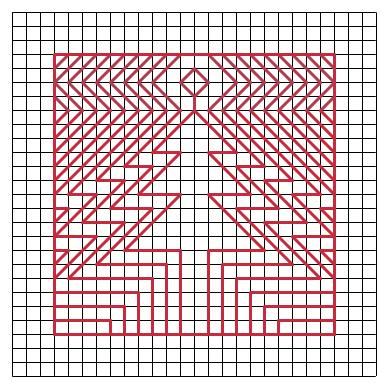
And the pattern:
Can you find the difference? :D :D Actually, I made a mistake but was too lazy to frog it, so I adjusted the pattern: there is one extra stitch on the top in the stitched version - now you can choose which version you want to stitch.
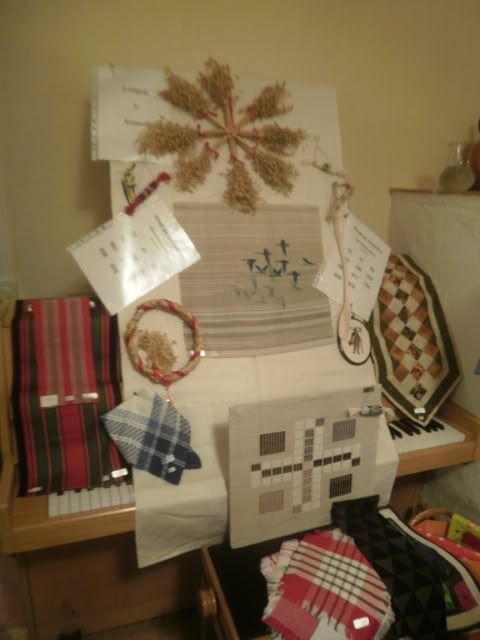
Also, I would like to share with you some pictures from our afternoon trip: we visited the julmarknad, that is Christmas market in Gammla Uppsala. There were lots of crafty things. Unfortunately, most of my photos turned out to be horrible, but these two perhaps give you an idea:
Happy Christmas preparations, everyone. :)
Subscribe to:
Posts (Atom)