Welcome


Welcome to my blog. You can read about my adventures in different types of needlework, and I also offer some free
cross stitch patterns. Please, come back often. :)

CAN'T SEE THE PICTURES? READ ABOUT THE PROBLEM HERE.

PLEASE NOTE:


PLEASE, NOTE: The designs on this site are copyrighted to Agnes Palko. They are for your personal use only. They may not be distributed or reproduced without permission.
If you wish to use my patterns to stitch for charity, please, let me know.

21/07/2011

Stitching "Diagon Alley"

I hope some of you realise by the title that I am a fan of... ????

Anyway, you already know I love playing around with colours. Also, the other day I was looking at a big piece of Aida with slanted edges - because I stitched a square on it that was stading on its corner, and realised that I don't have to cut it off, I could stitch something on that diagonally.

This is how the following bookmarks were born. Three cross stitch and one blackwork. Would like to try them out soon, but I am in the middle of moving now, and for relaxation I am knitting a simple baby pullover so they have to wait. But you just go ahead! :)

Photobucket


Photobucket

Photobucket


Photobucket

18/07/2011

Over 20 000 visitors

Wow, my blog statistics show that I have reached more than 20 000 visitors. Thank you so much for your interest! :D :D

(Not the counter at the bottom of the page, I only set that one up when I already had more than a thousand, so that is a bit behind.)

I think I will do some giveaway to celebrate this, but you must be patient with me and wait for it, about two weeks I think, because I am just about to move to another country.

So, again, watch this place! :D

Oh, and I stitched one of the latest freebies. I stitched Algerian eyes for the stars, I think it turned out rather well. Will be a pincushion one day.

Photobucket


Let me also show you my latest finishes. The baby sampler just waits for the date and weight.
The other one is a Hungarian proverb translated into Swedish and changed just a bit.
"He who likes nature ("flowers" in the original), cannot be a bad man".
I used a French freebie as the border.

Photobucket

Photobucket

14/07/2011

New free cross stitch patterns

I made some more cross stitch patterns, can hardly wait to stitch them. I planned them in black and gold, stitched on white or perhaps some very light grey aida. The stars could be stitched as Smyrna stitches or Algerian eyes, as you prefer.

This could be a nice pincushion or ornament but would also work well for a card:

Photobucket


The next two are a bit bigger. Of course, you can always leave out a few lines or columns, since it is a repetitive pattern. I am planning to use them for a top of a wooden box and a notebook cover, if I ever get down to stitching them.

Photobucket

Photobucket

And a bookmark:

Photobucket

Of course, as always, feel free to change the colours. I would really love to see if someone stitches them.

I hope you enjoy them. Happy summer, everyone. :D

Tutorial: how to crochet a cosmetic bag. Very easy. Part 2 - lining.

Hello, here I am with the lining part of the tutorial.

I used a lovely Hungarian traditional cotton fabric to line this bag. I had a stripe cut off which was roughly the right width (about 20 cm), so I just had to cut a piece of it twice the height of the bag. Sorry, I didn´t do any measuring just adjusted it to the bag. I folded the fabric in half, this is how it looks with the bag:

Photobucket

Then I cut off a little from the corners, to follow the shape of the bag. I didn´t want too much bulk in the corners.

Photobucket

Then I folded the fabric right side in, and sew together the two sides.

Photobucket

I stitched with hand and used backstitch, this is how it looks from the two sides:

Photobucket

Photobucket

This is how it looks when I turn it right side out - but then I realised I don´t have to do it. :)

Photobucket

Because the lining goes in the bag so that the right side faces inwards:

Photobucket

Then I had to adjust it a little. Since the crochet is flexible, it is possible to smooth out the fabric quite nicely inside. This is how it looks then:

Photobucket

Now only the edges are left to stitch. First I folded and pinned them, then I sew them to the crochet with very small stitches.

Photobucket

Unfortunately I don´t have a zip with me here and don´t want to spend money when I have a few at home, so that will have to wait.
But here is a nice tutorial how to sew in a zip, if you need it.


While making the previous two bags, I had some experience with it. With the first, I sewed in the lining first, then the zip. With the second, I tried to put the zip´s fabric part between the crochet and the lining. It was much more difficult to sew and it wasn´t better looking at the end, so I chose the first option this time.

As for the embellishment: I want to wave in a nice looking ribbon in the double crochet row this time, so that will also have to wait until I am home.
The flowers on the previous bags were made using this series of crochet tutorials on YouTube by Theresa:

I think I will make them again, they are so well explained in these tutorials.

I hope I helped if someone wants to make something similar.

10/07/2011

Tutorial: how to crochet a cosmetic bag. Very easy. Part 1

I have been away from the blog for quite a while, but I am back now. I crocheted another one of the little bags and took pictures of the steps, so here is how it was made. This part is only about the crochet, I will come back soon with the lining and putting in the zip.

I started with a chain of 40.

Photobucket

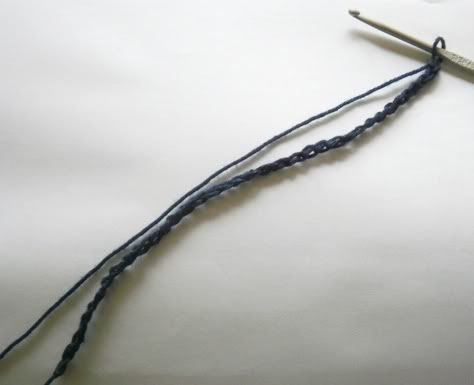
Then I did one single crochet in each chain.

Photobucket

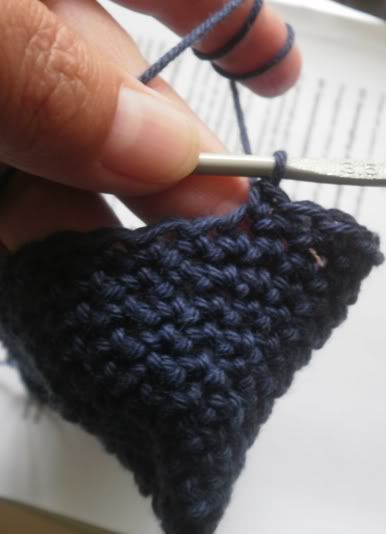
When I reached the end, I turned but not the usual way. I turned around, if that makes sense, and did another single crochet on the other side of the beginning chain.
I hope you can see it here, at the bottom is the first row I made, and at the top I am just starting the other row in the starting chain.

Photobucket

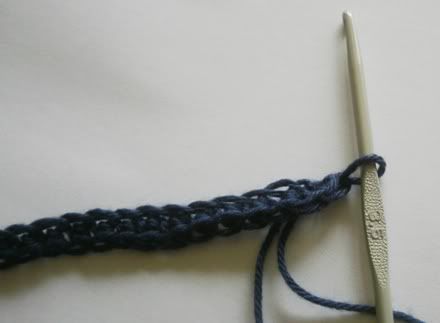
So when I finished this row, I actually finished a round, and I had this:

Photobucket

It is good to remember that you finish a row when you are just at the opposite end from the starting tail.

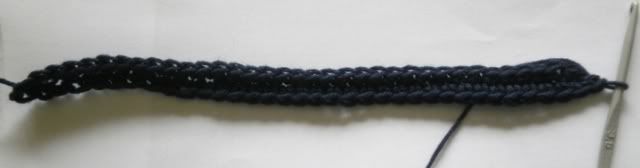
After two more rows, with no increasing, you can see how the bottom of the bag starts to take shape:

Photobucket

And you just go on and on, round after round of single crochet. Easy as pie :)

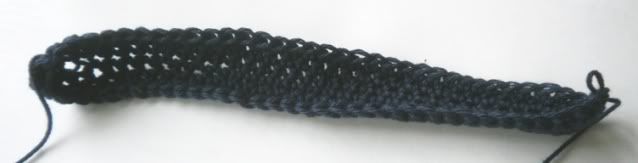
Since I wanted the sides of the bag to be a bit slanted, I did one increasing. If you don´t want it but prefer a straight side, you can omit this step.
So I increased two stitches at both ends (you can find where exactly if you flatten the bag):

Photobucket

I crocheted two single crochets in the two middle stitches.

Photobucket

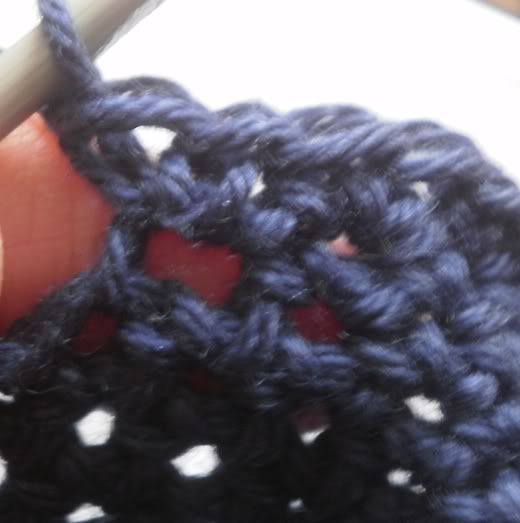
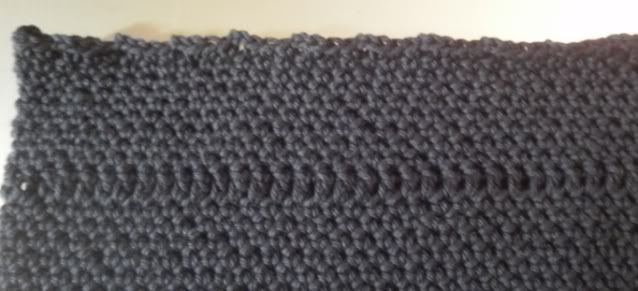
When the bag was 9 cm high, I did a row of double crochet. This is where I will weave in a string or a ribbon for decoration. Again, if you want, you can leave this out.

Photobucket

Then I went on with my single crochet again and when I reached the desired height, I did a final row of a kind of picot or wavy finish:

Photobucket

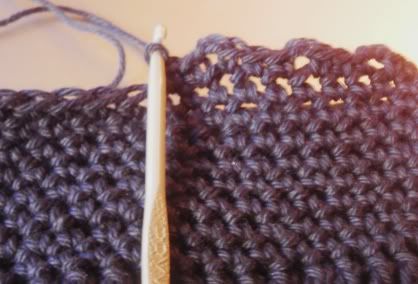
It goes like this: *one single crochet, one single crochet, chain two, single crochet in the next stitch* - and repeat between the *s.

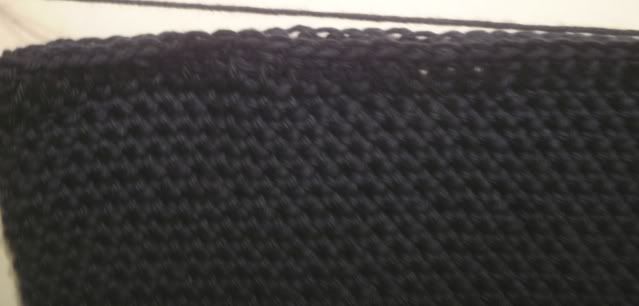
This is what the edge looks like when done:

Photobucket

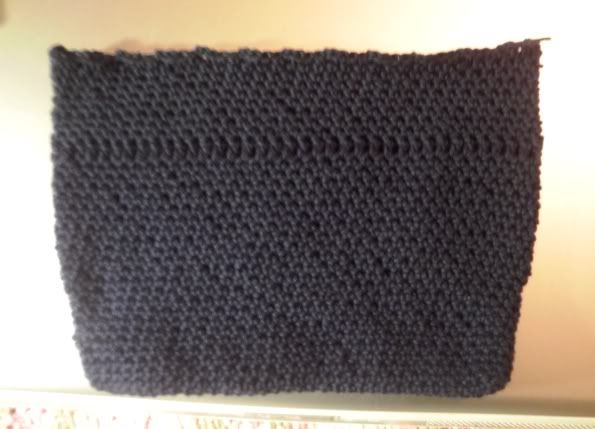
And this is the whole little bag. No sewing together needed.

Photobucket

See you soon with the rest. And some more freebies to stitch. Watch this place :)