I made this little pincushion out of it. Still thinking whether to add a button in the middle or not.
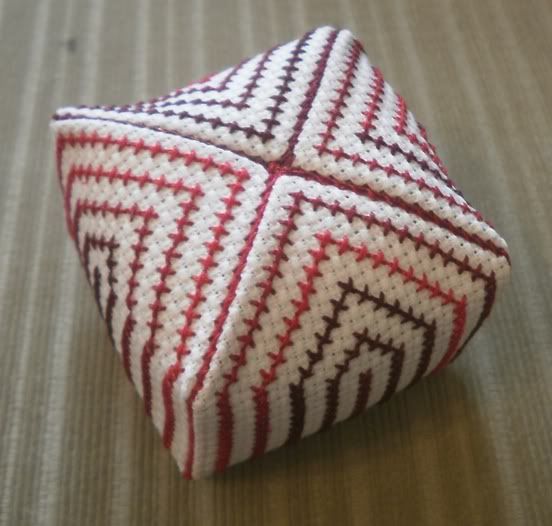
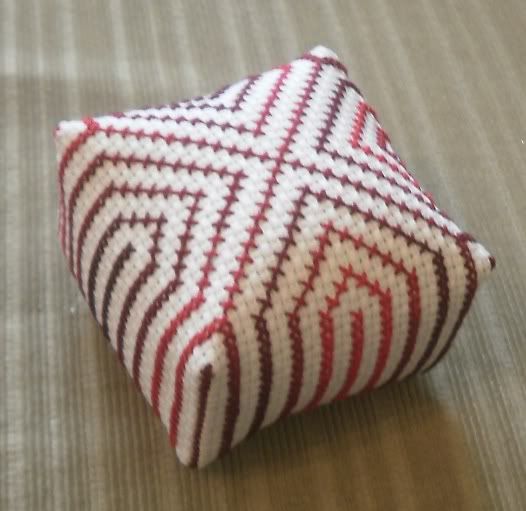
This is what it looked like before stitching a line of backstitch around it and whipstitching the sides together:
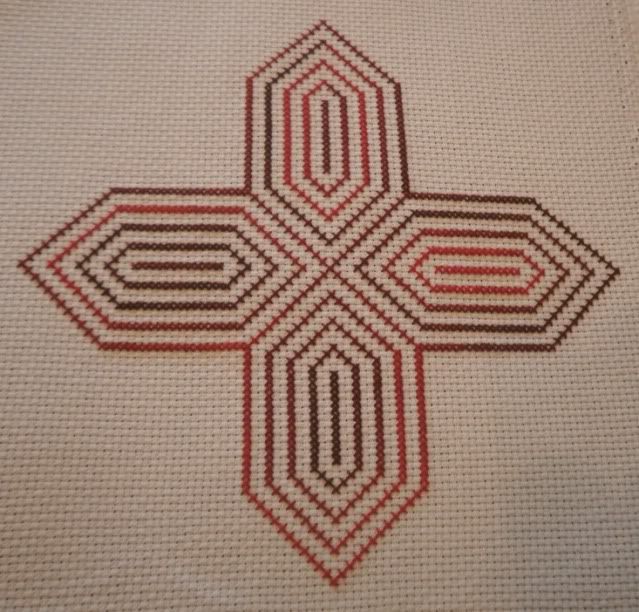
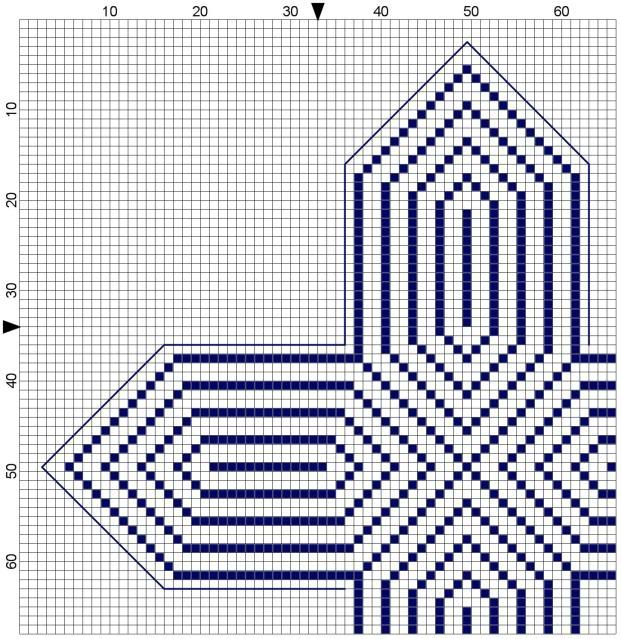
Here is the pattern for you. I drew it in blue, but I stitched it in my favourite DMC 115 colour. I think it might also look good in rainbow colours, feel free to experiment with it.
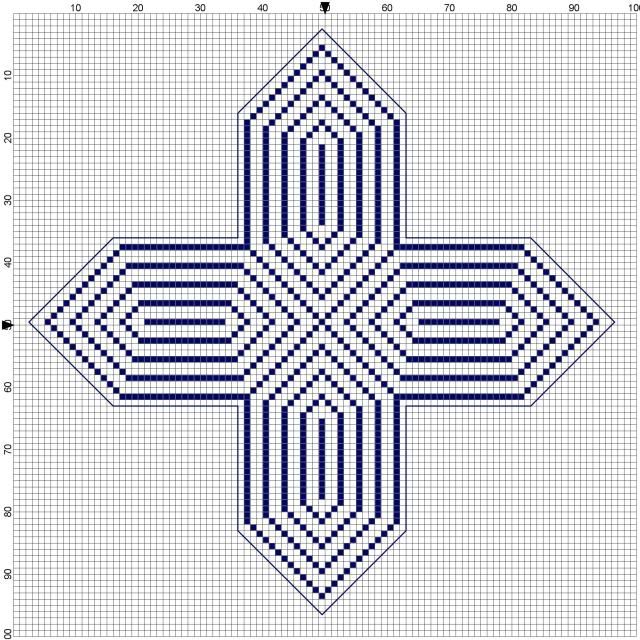
Since it is quite big, I made a cut off of a quarter of the pattern, to make printing easier, this is actually enough, you just turn it around 90 degrees :)
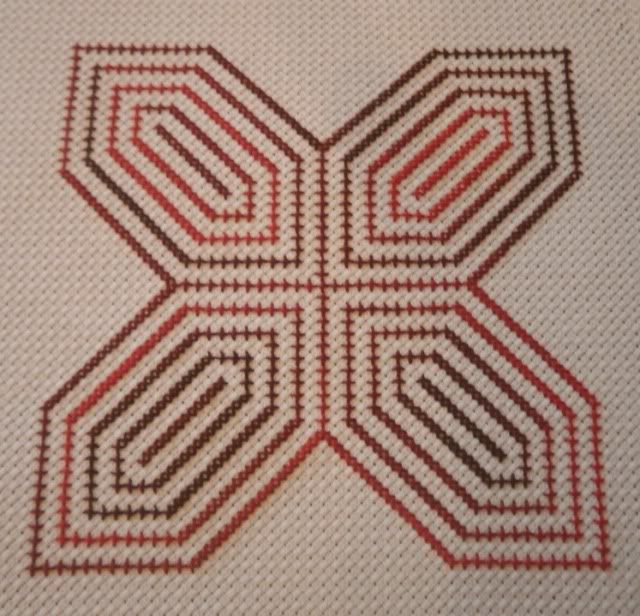
I really like how the pincushion turned out. But on the other hand, I am thinking to stitch it again in a flat version, perhaps for a cushion. But then I would use it turned around 45 degrees, like this:
I thought that this way I might need something to put into the corners. So I came up with this version. But again, I am not sure I will keep to these colours. (Sorry, my program doesn't let me turn the pattern 45 degrees.)
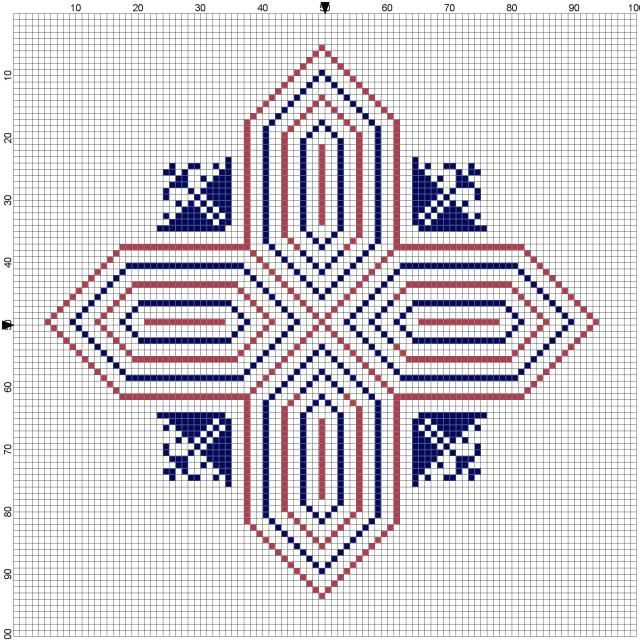
I find it interesting how the modern stile of the lines and the traditional form of the flowers meet. Hope you will like it too.
17 comments:
Your little cube cushion is so cute :) I'm in awe of your excellent and very neat whipstitching!
Thank you! :)
Great idea! Thanks! :o)
Best wishes
Cathi
Wow! What a clever design!
Simply stunning!
http://dragonsluver.blogspot.com/2011/07/stitching-update.html
I stitched your cube. Thank you so very much for the design. I loved stitching it!!
i have almost finished my pincushion but as it's the first i've ever done can i ask you how you sewed it together please i'm not sure which stitch to use..
p.s. i will send pics when it's completed, a before sewn up and after :)
The trick is to sew a line of backstitch around the pattern, and then use a simple whipstitch to sew the sides together. But as you stitch, you only push the needle under the backstitch, not into the material.
It's the same finish that is used for biscornus.
I hope that helps. :)
Katie, your little cube is adorable, love the colours!
Ah right thank you for that, i was struggling slightly..
as promised the links to my finished pincushion hope you like what i've done :)
before:http://www.facebook.com/photo.php?fbid=1820696606444&set=a.1681952137919.2078564.1511051926&type=1&theater
after:http://www.facebook.com/photo.php?fbid=1820696846450&set=a.1681952137919.2078564.1511051926&type=1&theater
so sorry the pics are blurry but i have constant shakes and my camera is quite basic..
IvyRose, I am so curious to see your pincushion but unfortunately the links did not work for me. Can you try once again, please?
so sorry about that, try this one see of it works:
http://s231.photobucket.com/albums/ee54/reggyp_01/cross%20stitch/
Yes, it does. How lovely! Well done and thanks for choosing my pattern :)
This is so amazing! just as beautiful as the other pattern you so generously share!
Could you please direct me to a place where it is shown how to assemble the cube?
Thank you very much.
Hi, I haven´t written it down, but as I said in another comment, first sew a line of backstitch around the pattern, and then use a simple whipstitch that goes under the backstitch, not into the material, to sew the lines together.
It's the same finish that is used for biscornus.
I hope that helps. :)
Let me know if this does not make sense and I will try to make a little tutorial.
How pretty!
Post a Comment